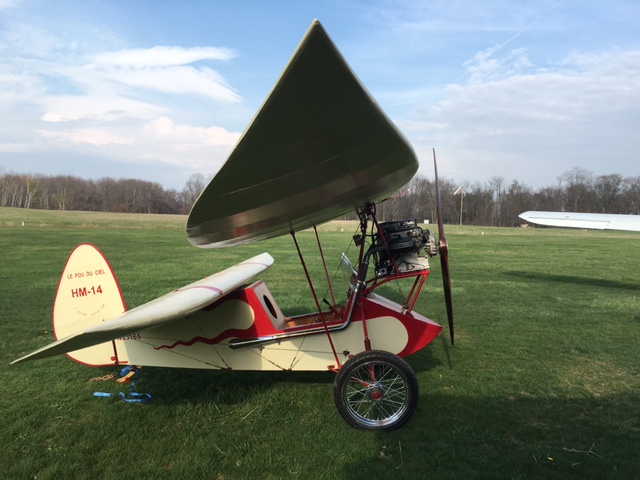
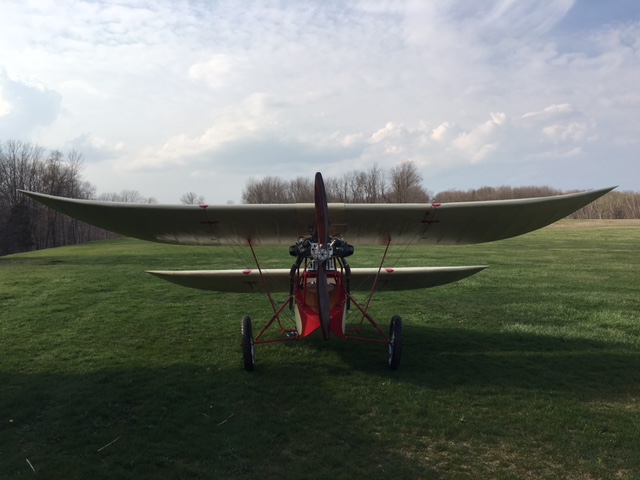
Bringing It All Together
SUN 26JUL2015 Middlebury, CT
My friend Ed and I transported my HM-14 out to the airfield last Sunday, but it wasn't until today that I was able to begin assembly of the wings and place them onto the fuselage. There is still a lot of work to do and the entire arrangement at this stage is precarious, but I definitely have a feel of what the finished project will look like. The main things now are:
1 - Finish and install the fuel tank
2 - Finish the incidence control tubes and weld the angled arms onto the tube connecting to the control stick
3 - The engine mount.
Of course, the requisite electrics, plumbing for gas flow and instruments need to be done, but the above represents the major milestones.
SUN 02AUG2015 N41- Waterbury Airport
SAT 05SEP2015 N41-Waterbury Airport
Yesterday I completed the technical analysis of the aircraft in its present state- Dry/Wet Weights, Wing Loading, CG calculations and reconfirmed its compliance to the Mignet Formula- to ensure the proper vertical and horizontal gap spacing between the top and bottom wings. I have summed up the information in the 2 photos below.
SAT 12SEP2015 N41-Waterbury Airport
My friend Ernie made this amazing gas tank in 2 sections for me, and with a Stearman gas gauge inserted into the bottom for easy in-flight reading!
SAT 26SEP2015
A lot of detailed work and small steps now. he gas tank is "permanently" in with its straps and turnbuckles, and the plumbing has been test-fitted. The next step is to cover the gas tank and associated open wing sections with 5051 aluminum sheeting, which I hope to do his week. Once the aluminum sheet is shaped, painted and attached to the wing, then I can secure the plumbing for good and make the engine mount. I also installed the tubing from the wing to the cockpit for the airspeed indicator.
Once the engine mount is made- should be a quick job- I will re"install" the engine and reconfirm he placement for the desired CG of 23%-25% of MAC. Adding back in the few additional things, wet/dry, battery, pilot, prop, etc., I will lock the engine placement down by attaching its baseplate to the mount. Then it is easy to connect the plumbing, ignition, etc and test fire it. Oh, I also need to make up the exhaust pipes and finalize my prop order.
Hoping to fly this year before it gets too cold!
SUN 04OCT2015 Middlebury, CT
This weekend I made the aluminum covers for the gas tank area. It's a lot of back and forth from work bench o aircraft, to make sure hat each hole is in he correct position and that the sheet lays flat. Today I completed the 3 panels and this week will try and get around to painting them the same ivory color as the rest of the wing. Once painted and reinstalled, I can then reattach all the plumbing and wrap up the engine mount.
This weekend I made the aluminum covers for the gas tank area. It's a lot of back and forth from work bench o aircraft, to make sure hat each hole is in he correct position and that the sheet lays flat. Today I completed the 3 panels and this week will try and get around to painting them the same ivory color as the rest of the wing. Once painted and reinstalled, I can then reattach all the plumbing and wrap up the engine mount.
SUN 11OCT2015 Middlebury, CT
Aluminum Covers, Plumbing and Engine Mount.
This week I painted the covers and yesterday I reinstalled them. Interestingly, the top section in the upper leading edge area didn't lay as flat as before (?) so I inserted a strip of felt (like I did under the stainless steel straps that hold the fuel tanks against the spars) along each side of the upper aluminum cover and it really helped- I'm happy with it now. Then it was time to apply plumbers tape to the fuel fittings and fuel gauge.
And then I cut the engine mount tubing, fit it together and then clamped it in position. I am very happy with the way it came out- all amgles on both sides are symmetrical and the top rectangle is all at O-degrees. I plan to work with my friend Ed who will spot weld everything while in place, then we can remove the mount to more completely weld it up. After that, we will reset the large 0.25" thick 4130 plate on the rectangle, then the engine, then recalc the CG before locking into position the engine and plate. Of course, trimming the plate of unnecessary dimension may affect the CG again, so stay tuned on how we deal with that phase
WED 21OCT2015 Middlebury, CT
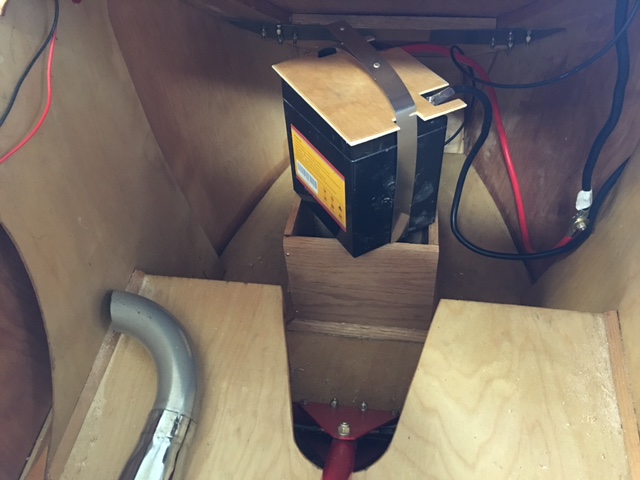
I have now installed the windshield and compass. The windshield is a cast-off motorcycle windshield (price was right!) and the compass is from a boat. If it doesn't work out, I'll swap out with a proper aircraft compass, which I have on hand. I received my battery but wow- it's large and heavy - 30 Amp Hours (12V) and 19 lbs! I will see about making a bracket inside the very front of the aircraft that the sealed battery can slip into. At least that bracket will attach to the substructure of oak, so it should be strong enough. CG shouldn't be an issue either
I have now installed the windshield and compass. The windshield is a cast-off motorcycle windshield (price was right!) and the compass is from a boat. If it doesn't work out, I'll swap out with a proper aircraft compass, which I have on hand. I received my battery but wow- it's large and heavy - 30 Amp Hours (12V) and 19 lbs! I will see about making a bracket inside the very front of the aircraft that the sealed battery can slip into. At least that bracket will attach to the substructure of oak, so it should be strong enough. CG shouldn't be an issue either
SUN 21NOV2015 Middlebury, CT
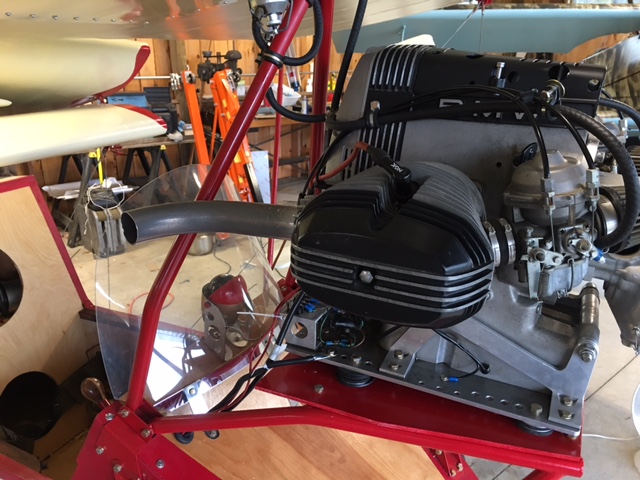
I guess work has had me busy for a while- but I've still found a way to keep working on the plane. Today, with the help of friends Marc Carofano and Charlie Nappe, I got the engine running. I bought it in the summer of 2014 and I believe this is the first time it has probably run in 3+ years. Started right up though and ran well. Check out the video here.
I guess work has had me busy for a while- but I've still found a way to keep working on the plane. Today, with the help of friends Marc Carofano and Charlie Nappe, I got the engine running. I bought it in the summer of 2014 and I believe this is the first time it has probably run in 3+ years. Started right up though and ran well. Check out the video here.
SAT 28NOV2015 Middlebury, CT
After the very important step of confirming the engine runs, I've been working on some of the small clean up tasks- the battery I got for a really great price is rather large and heavy- so the question was where to put it- I finally decided to put it in front of my seat, acting as a forward stop to my control stick, and as it is under the bend of my knees, it's not really in the way. If it had been smaller or lighter, I'd have tried to place it in the lower of the 2 holes in my seat back.
After the very important step of confirming the engine runs, I've been working on some of the small clean up tasks- the battery I got for a really great price is rather large and heavy- so the question was where to put it- I finally decided to put it in front of my seat, acting as a forward stop to my control stick, and as it is under the bend of my knees, it's not really in the way. If it had been smaller or lighter, I'd have tried to place it in the lower of the 2 holes in my seat back.
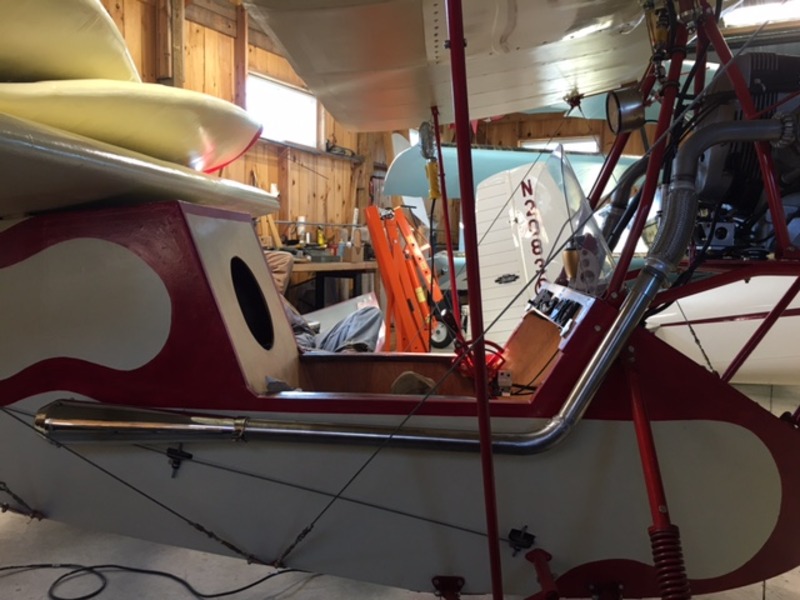
There is also the exhaust system- I want to use the mufflers that came with the engine, but I'll need to attach them to the sides of the fuselage, just under the side of the cockpit. If needed, I can make up cooling jackets with slotted holes. For now though, I can continue to test the engine with the pipes cut as shown- though the noise is considerable.
In the photos and drawing of the HM-14, you can see how the top wing's pivot point at the top of the triangular frame has a third "leg" than comes down from the pivot to the engine. So your engine either has an easy attach point, or you must create one. I am using 2 bolts that atach the cover the engine behind the redrive. I used .080" 4130 and am not yet sure that is thick enough. If I need to, I can create another and sandwich them together for a bit more strength. One thing I want to do is add a nice design to that flat surface- perhaps the one shown?
SUN17JAN2016 Middlebury, CT
With end of year work, wasn't too much to report until today. In all of the photos of HM-14s and HM-14/360s I have seen, these is support tubing between the top wing pivot area and the engine. When I proposed doing the same thing on the Flying Flea forum (Yahoo group), almost everyone without fail counseled me against it, citing concern that the motor vibration might weaken some critical welds where the top wing attaches. So I worked out another plan, where the tubing would connect to the engine mount plate, bypassing the vibration concern. Today I also installed the tachometer- just need to wire it in. At this time, the main things I still need to address are installing the Fokker DVII throttle quadrant and connecting the throttle and choke cables and ordering & installing the propeller, to be made by Culver Props.
With end of year work, wasn't too much to report until today. In all of the photos of HM-14s and HM-14/360s I have seen, these is support tubing between the top wing pivot area and the engine. When I proposed doing the same thing on the Flying Flea forum (Yahoo group), almost everyone without fail counseled me against it, citing concern that the motor vibration might weaken some critical welds where the top wing attaches. So I worked out another plan, where the tubing would connect to the engine mount plate, bypassing the vibration concern. Today I also installed the tachometer- just need to wire it in. At this time, the main things I still need to address are installing the Fokker DVII throttle quadrant and connecting the throttle and choke cables and ordering & installing the propeller, to be made by Culver Props.
SUN 07FEB2016 Middlebury, CT
Again, work has kept me busy lately but I did manage to order, receive, paint and assemble my throttle quadrant. I used some walnut I've had for the last 25 years for the handles, which is satisfying. This quadrant is a reproduction from a 1918 Fokker DVII. I had the same style quadrant in my Fokker DR1 Triplane, and like the feel of it. As I'm used to it, and the 2 arms connect to the engine's choke and throttle cables (versus mixture and throttle), I felt keep things familiar as possible for now. I also like the vintage look of it. Now I just need to decide exactly where in the cockpit to mount it, and then finalize the routing and clamping of the throttle and choke cables from the BMW engine. I ordered the propeller last week from Culver Props- should be done in approx 3 weeks!
Again, work has kept me busy lately but I did manage to order, receive, paint and assemble my throttle quadrant. I used some walnut I've had for the last 25 years for the handles, which is satisfying. This quadrant is a reproduction from a 1918 Fokker DVII. I had the same style quadrant in my Fokker DR1 Triplane, and like the feel of it. As I'm used to it, and the 2 arms connect to the engine's choke and throttle cables (versus mixture and throttle), I felt keep things familiar as possible for now. I also like the vintage look of it. Now I just need to decide exactly where in the cockpit to mount it, and then finalize the routing and clamping of the throttle and choke cables from the BMW engine. I ordered the propeller last week from Culver Props- should be done in approx 3 weeks!
SUN 03MAR2016 Middlebury, CT
Small steps... installing the throttle quadrant and confirming it works well with the engine, checking the W&B again empty and with gas tanks full, confirming status of the prop, and installing more instruments in the panel. Other than putting the prop on , confirming the tachometer connections and welding up the exhaust pipes, the aircraft is ready for certification.
Small steps... installing the throttle quadrant and confirming it works well with the engine, checking the W&B again empty and with gas tanks full, confirming status of the prop, and installing more instruments in the panel. Other than putting the prop on , confirming the tachometer connections and welding up the exhaust pipes, the aircraft is ready for certification.
TUE 26APR2016 Middlebury, CT.
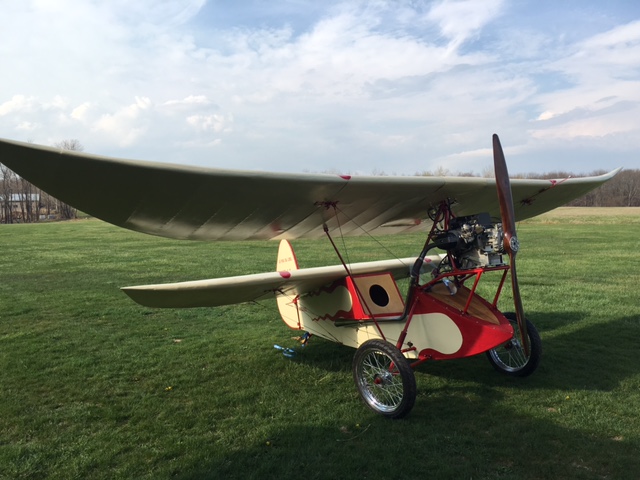
I've been busy! I worked on the wiring of my plane, inserting a master electrical switch, figured out the tachometer wiring with the help of Marc, a new friend, and got myself a propeller. A Culver Prop, 72 x 30, made by Alaina. It's beautiful and works great! This past weekend I did some taxi tests and while the fixed tail skid doesn't counter the prop's torque at low speeds, I found if I increased the throttle and the propwash, over the rudder, I could maintain pretty decent control- enough to taxi down our grass runaway and do a U-turn and return. I'll keep practicing.
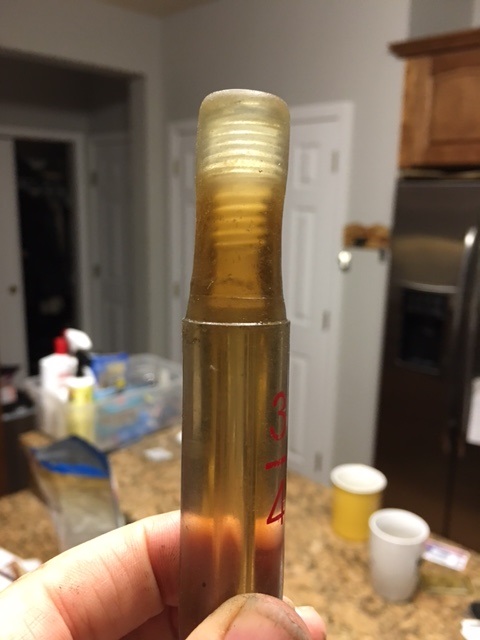
I'm finalizing my CG calculations for the FAA Certification, and I also realized that the ethanol in the 93 octane gas for my B<W engine was deteriorating my Stearman style plastic gas gauge. I alerted Aircraft Spruce to put an advisory on the sale of this item to alert people who may be using it with MOGAS with ethanol. So it's either no ethanol unleaded racing fuel or AVGAS.


